How to Create a Pattern Brush for Illustrator
Last month I released a free set of Floral Pattern Brushes for Adobe Illustrator, and boy, you guys loved them! And I can’t say I was surprised because they are so varied when it’s come to using them. Almost nothing is pre-made: applying brushes from the set to the different shapes and elements is a pure experimental act of creation, and it feels amazing. That’s why today I decided to tell about how you can create your unique pattern brush in Adobe Illustrator.
Step 1.
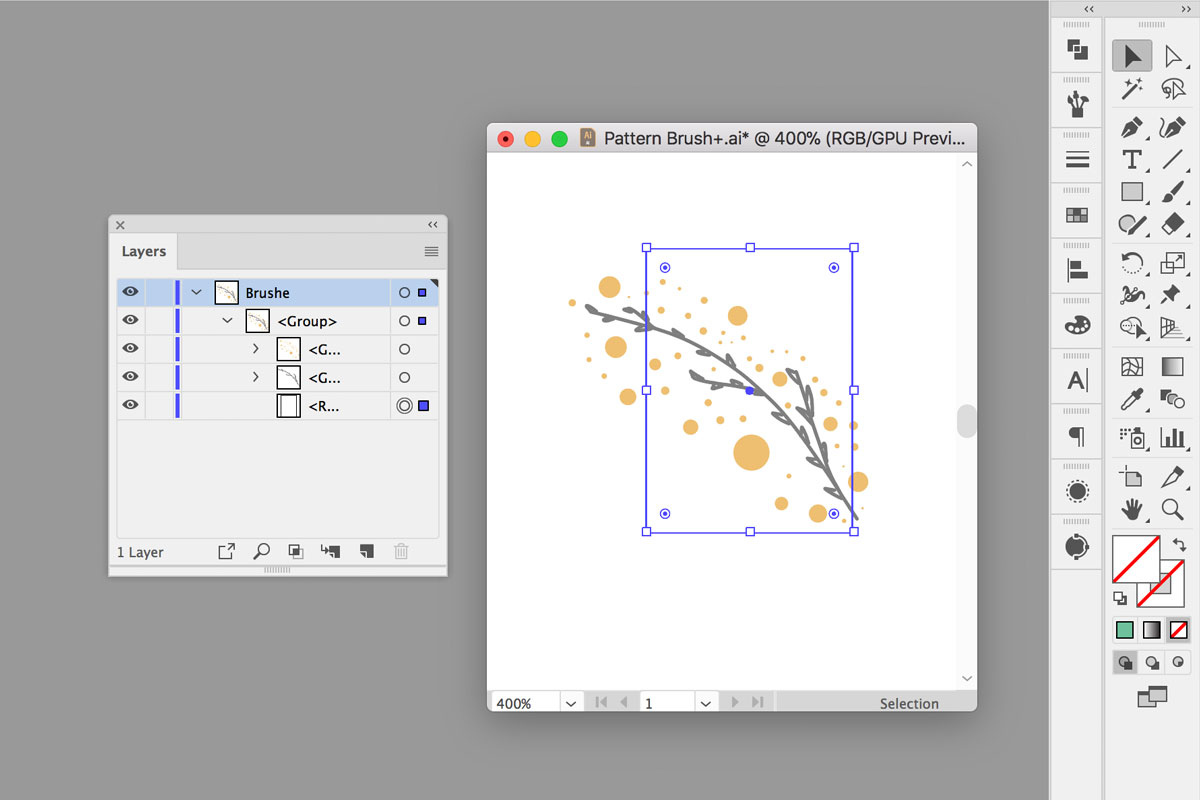
First thing first, to create a pattern brush in Adobe Illustrator, you will need a vector illustration as a basis (monochrome or color, it’s up to you). To keep it easy for a start, you can download the one I’ve created for this tutorial in the package below.
Now, when we have an illustration to work with, let’s take a look at the Pattern Brush “anatomy”. As you can see, it consists of 5 parts: outer corner tile, side tile, inner corner tile, start tile, end tile.
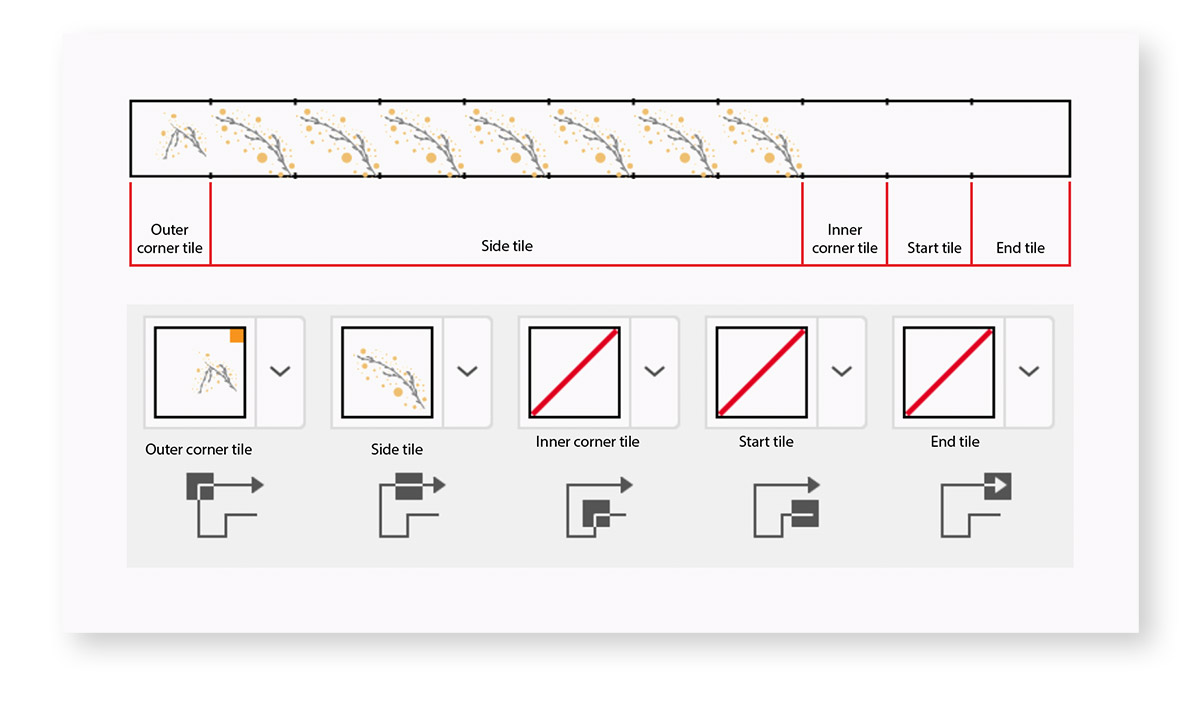
Our vector illustration will make a basis of the brush, the Side Tile. Outer Corner Tile and Inner Corner Tile will be automatically generated in a few versions to pick from. You can set them while tuning your brush in Options (Window > Brushes > double left click on the brush). Start Tile and End Tile, elements that will open and close your brush sequence (in case you want them to be different from you basis illustration) are being created manually. However, we want to keep it simple for this tutorial, so we’ll just skip them 😉
My point is that you can work with only one of those 5 parts of the pattern brush, Side Tile, and still create lovely and useful brushes! Or, you can dig deeper, and design illustrations for each part thoughtfully, but that’s a story for another ABC tutorial.
Life Hack. Try to keep original size of the basis illustrations not very big. Otherwise, it would be tricky to apply this brush to the square 50 x 50 pixels. However, small initial size of the brush doesn't mean you can’t increase it later by increasing the stroke size.
Step 2
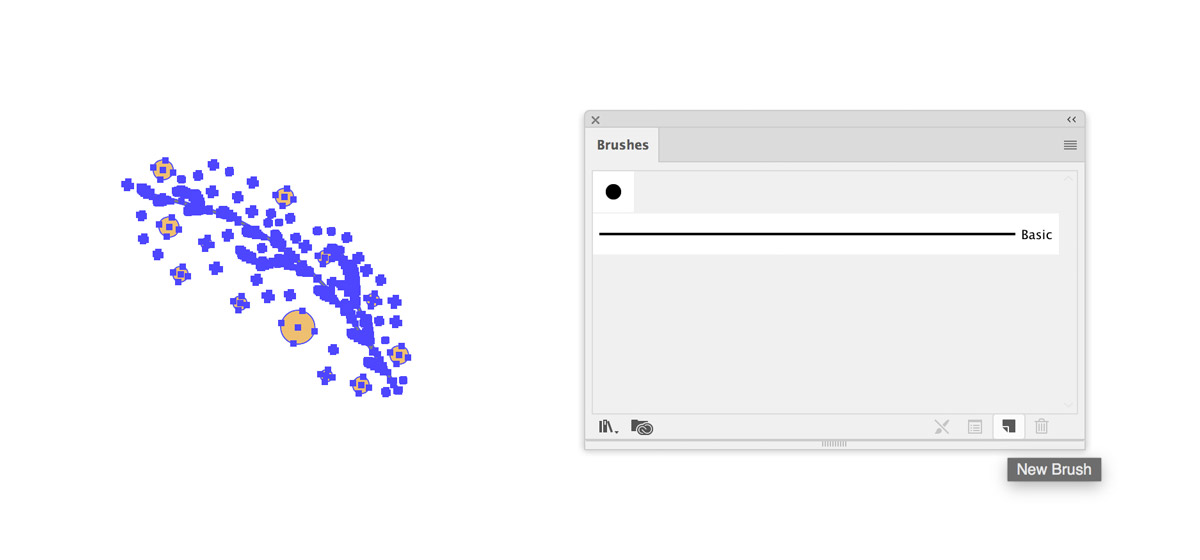
Now let’s create a pattern brush. Select the vector illustration for Side Tile, then choose Window > Brushes > New Brush.
In the popped-up window pick Pattern Brush. A window you’ll see after is a Pattern Brush Options window with brush settings.
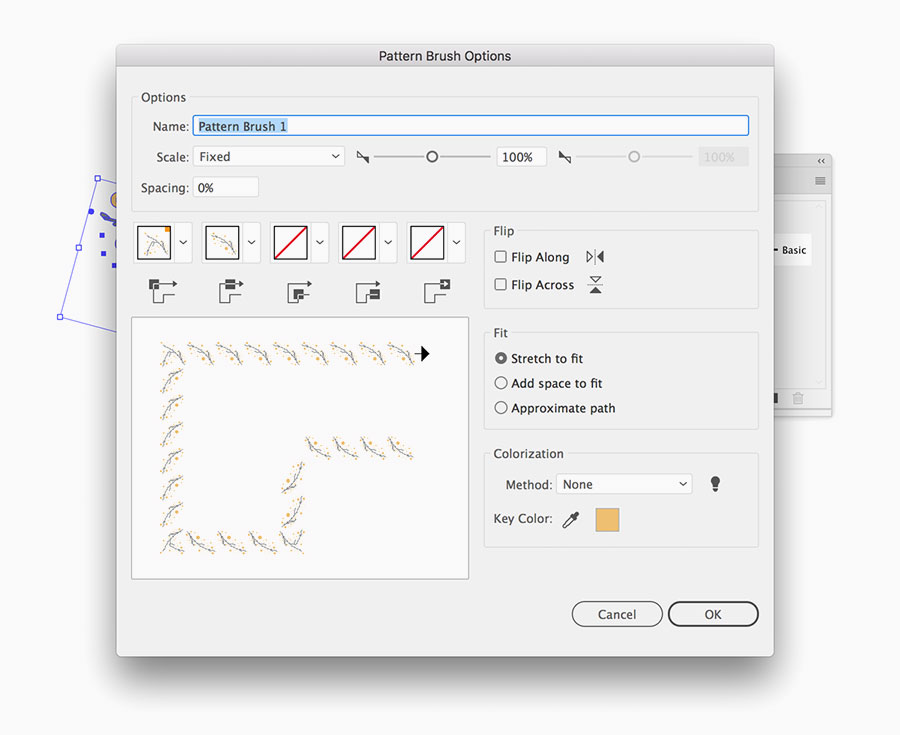
Set a name for your brush and tweak other options like scale, spacing between repeating elements, appearance of all 5 brush parts, flip, fit, and colorization (if you’re working with a color brush, make sure Method is set to None). After you’re happy with the preview, hit OK. Now you can find your ready-to-use pattern brush in the Brushes panel.
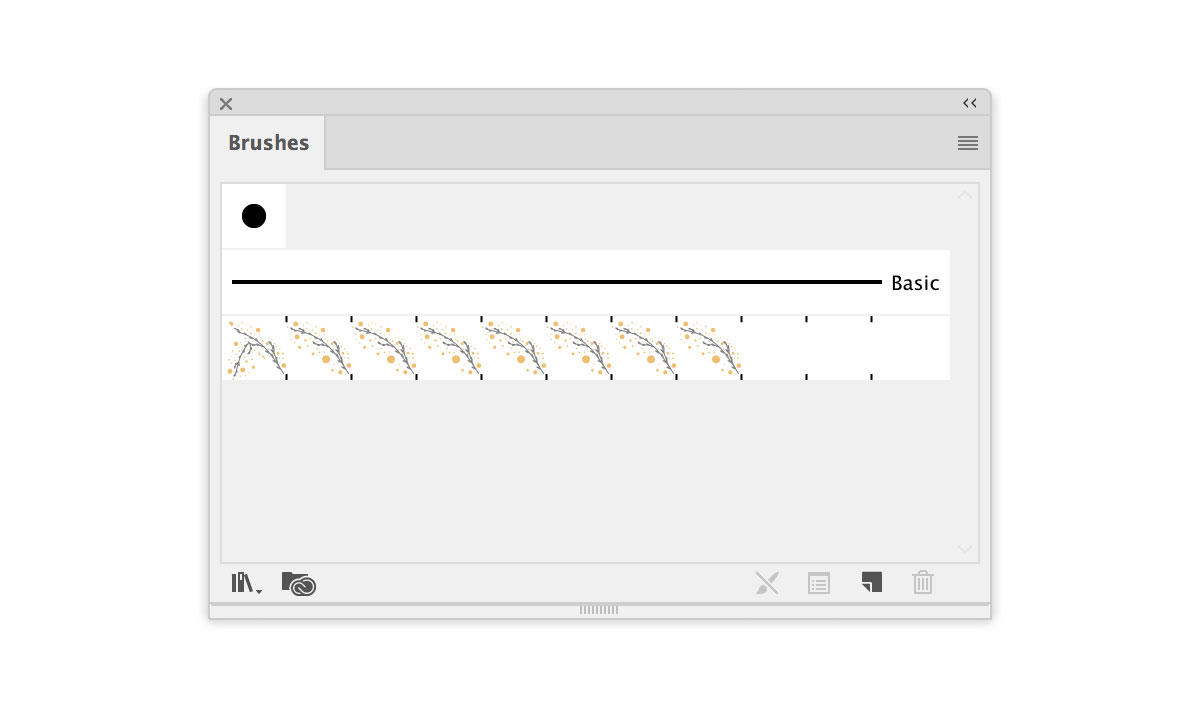
It can always be edited in the Options panel, just double click on the brush in the Brushes panel to open it.
Step 3 (Trick).
Adjusting pattern brush settings can be tricky, especially when we’re talking about Spacing. It can take only positive values, from 0 to 100%. But sometimes (it entirely depends on the illustration you use to create a brush from) even 0% value gives you leaves you with too big spacing. But there is a trick you can use.
Let’s open the source illustration once again. Now, create a rectangle using Rectangle Tool (M) with a width less then the one of the illustration. Arrange a rectangle layer under all illustration layers. Turn off Fill and Stroke for the rectangle layer (Window > Properties > Appearance > Fill, Stroke).
Select all layers in the document and create a new brush following Step 2. In the result, the initial spacing between the repeating elements becomes less. In case you got it too small, you can increase Spacing value in the Pattern Brush Options. Unfortunately, in these cases, you can’t say for sure what size the rectangle you should create to make you brush pacing perfect. But you will definitely figure it out after a few iterations.
Step 4
To export your brushes library just open Brushes Panel (Window > Brushes) and pick Save Brush Library in the top-right drop-down menu.
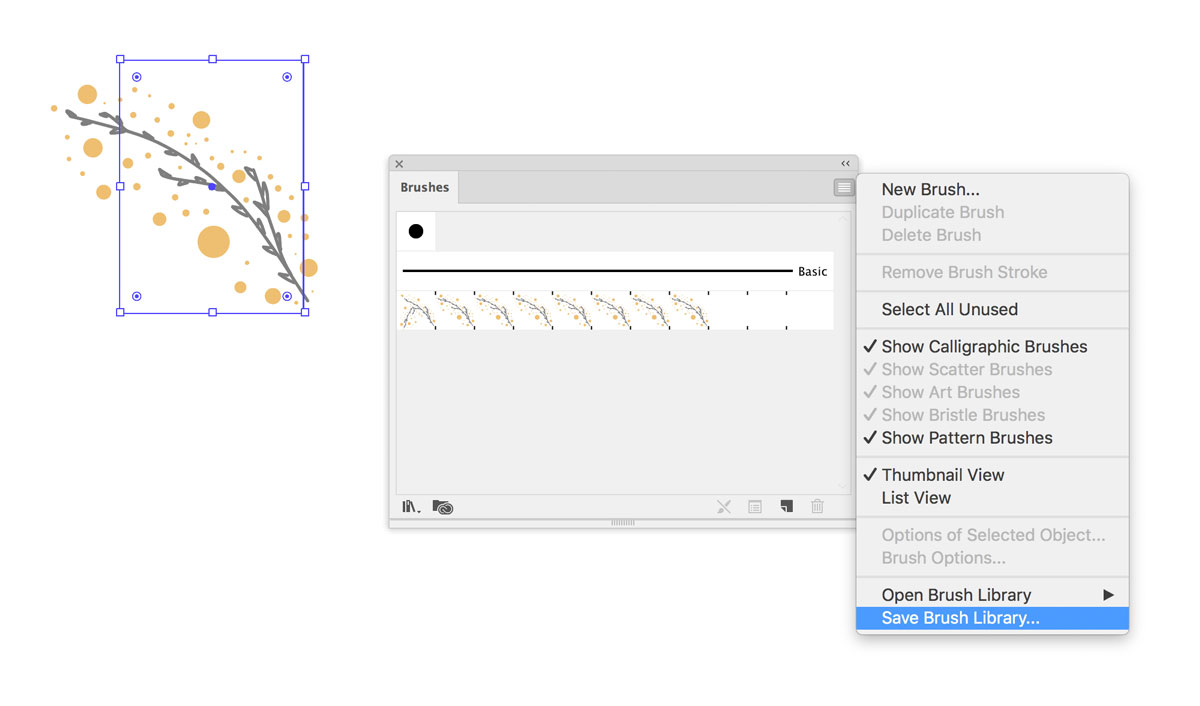
Pick the directory to save your file, properly title it and hit Save. Ta-daa! It’s done. Now you can add your brushes panel to any document you need, just open the top-right drop-down menu on the Brushes Library (Open Brush Library > Other Library, and browse your saved brushes file).
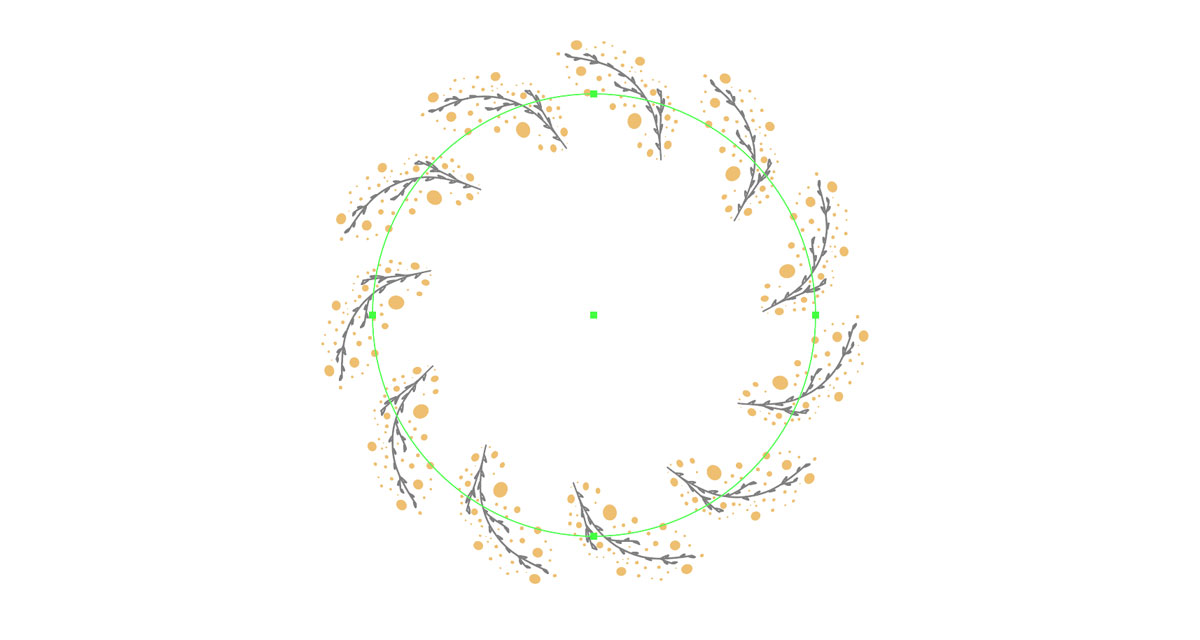
Have fun experimenting and creating your unique pattern brushes!